| Model |
Date Released |
New Features |
Additional Remark |
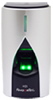 |
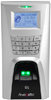
| H2i |
|
19 July 2011 |
Now you can input TCP/IP settings (IP address, Subnet mask, Gateway and Device ID) via USB numeric keypad. This feature does not require you to connect the hardware to TCMS v2 by using default IP address, all you need to do is to plug the USB numeric keypad to setup all TCP/IP settings in H2i |
Click to view the user manual |
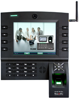 |
| i-Kiosk 100 Plus |
|
19 July 2011 |
This firmware allows inclusion of a new combination of verification type (FP&RF / FP & PW) into Different Verification Method. Assign the user with the new Verify Type, and users can choose to verify by fingerprint + card or fingerprint + password. |
To assign users with the new verification mode:
Press Menu > User Management > Manage User > A&C Settings > VerMode > Change to FP&RF/PW > Save settings > Restart to take effect. |
 |
| i-Kiosk 100 |
|
| |
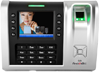 |
| Q2i |
|
|
19 July 2011 |
The firmware adds new option to delete time zone denied transactions, where users are verified at the terminal but cannot gain access due to time zone settings, from normal transactions. The terminal will only save transaction records of users that are allowed access at the terminals. |
To use the new feature:
Update the firmware > Download the FingerTec Terminal Function Tool > Enable the feature into the terminal by using the tool
To download the FingerTec Terminal Function Tool:
Visit tips.fingertec.com > Download > Tool > FingerTec Terminal Function tool (or click here to download > Extract to get FingerTec Terminal Function Tool.
To enable the feature in terminal:
Run FingerTec Terminal Function Tool > Insert IP address of terminal > Connected to terminal > Access Control > Do not save TZ log > Yes > Update > Restart > End.
|
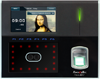 |
| Face ID 2 |
|
19 July 2011 |
The firmware allows the Face ID 2 to capture user photo during any methods of verification. The photos will be captured and saved into an internal memory and downloaded into the software for record. The records contain both successful and failed verification at the Face ID 2 terminal. |
To use it:
Update the firmware > Enable the option Capture mode
To enable the Capture mode in Face ID 2:
Menu > System > Display > Capture Mode > Photo & Save
To view photo in TCMS v2 software:
Run TCMS v2 > Terminal Multimedia Management > Captured photo > Success or Fail > Download
|
 |
| R2 |
|
| |
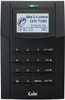 |
| Kadex |
|
|
19 July 2011 |
The firmware allows addition of a new option where you could isolate Antipassback transactions from the normal transactions. When you enable the feature, it will prompt the R2 to save the records in cases where the terminal blocks a user from access due to Antipassback. |
To use it:
Update the firmware > Download the FingerTec Terminal Function Tool > Enable the feature into the terminal by using the tool
To download the FingerTec Terminal Function Tool:
Visit tips.fingertec.com > Download > Tool > FingerTec Terminal Function tool (or click here to download > Extract to get FingerTec Terminal Function Tool.
To enable the feature in terminal:
Run FingerTec Terminal Function Tool > Insert IP address of terminal > Connected to terminal > Access Control > Do not save AP log > No > Update > Restart > End.
To view Antipassback log in TCMS v2:
Run TCMS v2 > Download data from terminal > Terminal Data Audit List > You will see a new record (6) Antipassback if the users are blocked to access due to Antipassback feature.
|
|
| R2 |
|
| |
|
| Kadex |
|
|
19 July 2011 |
This new firmware allows addition of a new option that supports 5 sets of Door Open-Close timer.
Door Open Timer:
Users do not need to be verified at the terminal to be granted access during a specific time period. The terminal is allowing the door to open without any restrictions.
Door Close Timer:
Users cannot gain access even after verification during a specify time period, as the terminal does not permit any access during the period.
Reminder: A terminal can support up to 5 different groups of time zone. By default, you must use Time Zone 1 before you can use any other time zones.
|
To use it:
Update firmware > download the latest Permanent Door Open-Close tool > Configure time zone for door open/close > update to terminal
To Download Permanent Door Open-Close tool:
Visit to tips.fingertec.com > Download > Tool > Permanent Door Open-Close tool (or click here to download) > Extract to get Permanent Door Open-Close tool
To Set Door Open/Close Timer:
Run the Permanent Door Open-Close tool > Insert IP address of terminal > Enable Force Open/Close > Select Force Open (Door open) or Force Close (Door close) > Set time period into relevant columns > Update > Restart terminal to take effect.
|