|
| ___________________________________________________________________________________________ |
| By default the TA200 Plus comes with an internal siren option only. To enable the external siren, you can add a relay and a siren cable to the MCU board by soldering it. |
| |
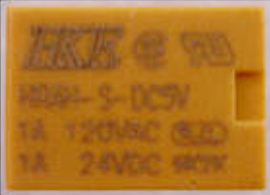 |
The relay should have this specs:
HRAH-S-DC5V, 1A 120VAC, 1A 24VDC |
|
| |
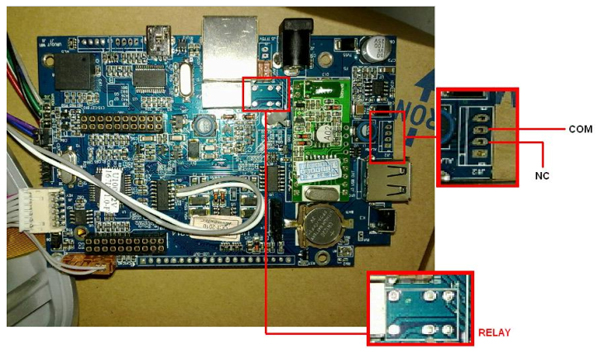
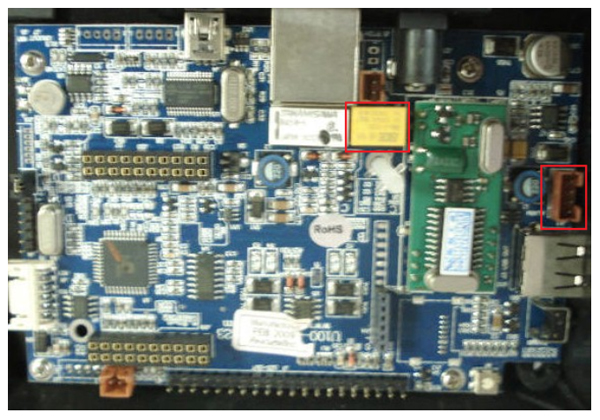
| Please refer to the image below for the location components that need to be soldered. |
 |
 |
| |
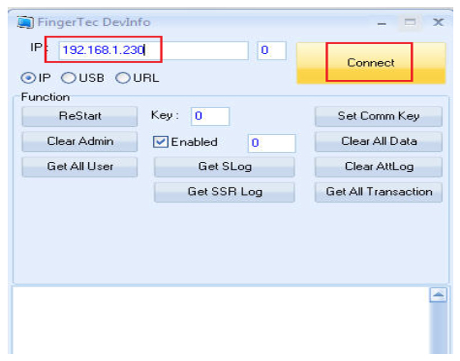
| After soldering the relay and the siren connector /siren cable, please check the platform of the terminal by using the Device Info tool. |
 |
| |
| 1. Double click Device Info. |
| 2. Key in the terminal IP address and click the Connect. |
 |
| |
| 3. After its connected, check the terminal platform. |
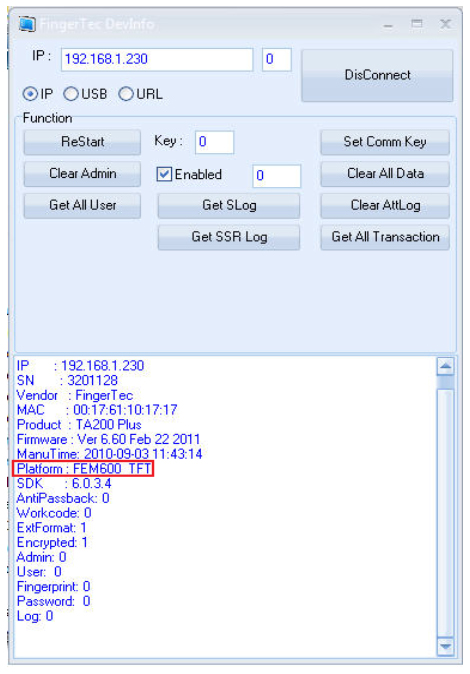 |
| |
| After checking the terminal platform, please update the terminal based on the platform firmware.
To use it: |
| 1. |
You fill find two folders labelled “TA200Plus_ExtBell FEM 510” and “TA200Plus_ExtBell FEM 600”. Click the button below to download the relevant firmware: |
| |
|
|
| 2. |
Use the folder based on your terminal platform. Based on the above example, the device information shows that the terminal is an FEM600 platform. Open the “TA200Plus_ExtBell FEM 600” folder. If you have the FEM510 platform, please use the “TA200Plus_ExtBell FEM 510” folder. |
| 3. |
Double click the “FTEnTA200PExtSiren” file. |
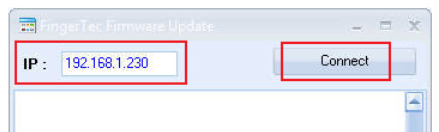
| 4. |
Key in the terminal IP address and click the Connect. |
|
 |
| |
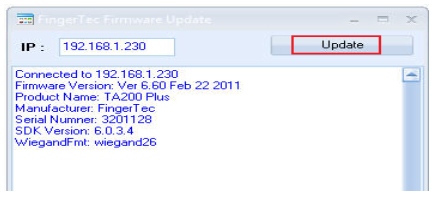
| 5. After connected, click Update. |
 |
| |
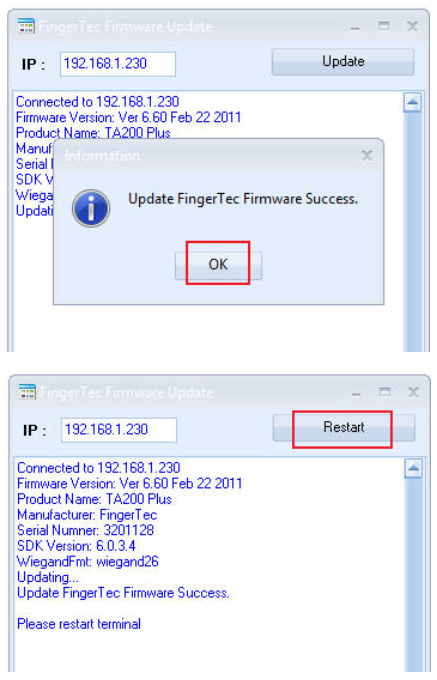
| 6. When the process is complete, click the OK followed by Restart. |
 |
| |
|