Common Mistakes that Cause Data in Attendance Sheet Can’t Be Viewed |
||||
( by Aidid Sharulzaman, Senior Technical Support Executive )
|
||||
| When you noticed that transaction logs are not present in attendance sheet, this might be caused by some common mistakes. You can correct these mistakes and re-generate the data in attendance sheet in order to review the attendance. You can check and try the following scenario and solutions if you experienced the same problem in your system. | ||||
|
||||
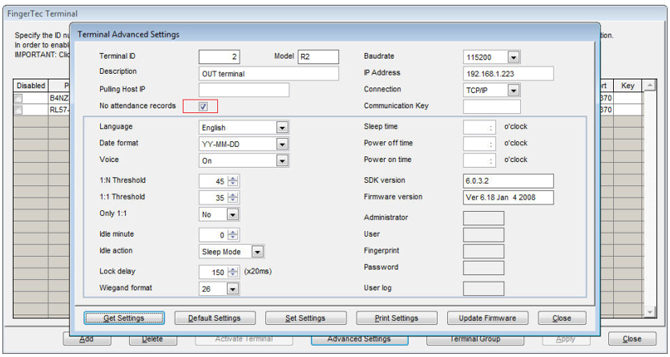
| If you checked the “No attendance records” box in the Terminal Advanced Settings, the transactions will not appear in the attendance sheet. The transaction will appear only in the terminal data audit list. | ||||
| Solution: | ||||
| If you want the transaction to reappear in the attendance sheet, please go to
Devices > Setup FingerTec Terminals > Advanced settings > Uncheck the “No attendance records” box. Then generate the attendance sheet. After the generating process, the transaction will reappear in the attendance sheet. |
||||
|
||||
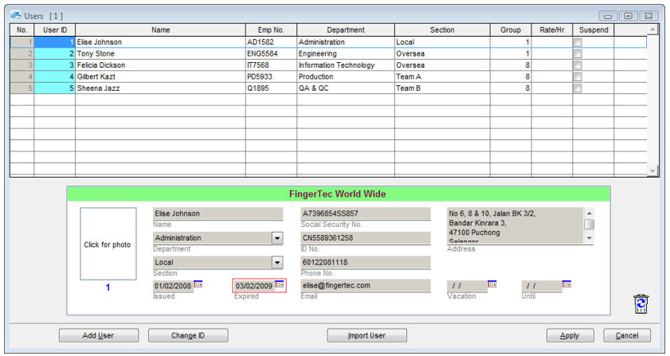
| The transaction will not appear in the attendance sheet for the user after his/her expiry date. The transaction will appear only in the terminal data audit list. | ||||
| Solution: | ||||
| If you want the transaction to reappear in the attendance sheet, go to Users > Select the user ID > Delete the expired date and generate at the attendance sheet. After the generating process, the transaction will reappear in the attendance sheet. |
||||
|
||||
Example: |
||||
| Solution: | ||||
| If you want the transaction 1/2/2009 to 4/2/2009 to reappear in the attendance sheet, please change the issued date to 1/2/2009 and generate at the attendance sheet. | ||||
|
||||
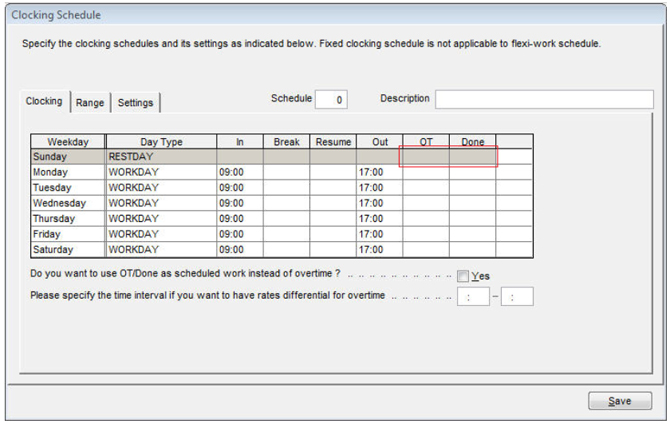
| The overtime will not appear in the attendance sheet if you didn’t specify the “Maximum no. hours allowed to claim for overtime” in the clocking schedule. | ||||
| Solution: | ||||
If you want the overtime to reappear in the attendance sheet, please specify the “Maximum no. hours allowed to claim for overtime” e.g. 24:00 at Configuration > Clocking schedule > Select the clocking schedule that you use > Edit > Setting > the “Maximum no. hours allowed to claim for overtime”. Please generate at the attendance sheet after making the changes. |
||||
|
||||
| Solution: | ||||
Please download the data from the terminal to view the attendance logs. To download the data, go to attendance and click the download button. To confirm whether the data is downloaded in the TCMSv2 or not, please check the attendance log at the terminal. To check the attendance log at the terminal, press menu>system info>att log. If the att log is “0”, it means that the data already downloaded to the software. If still have number, it means that the data is not downloaded yet to the software. Please check the connection between the terminal and PC. |
||||
|
||||
| Solution: | ||||
| Please make sure that the time and date at the terminal is correct because the transaction that appears in the TCMS V2 will be based on the terminal time and date. | ||||
|
||||
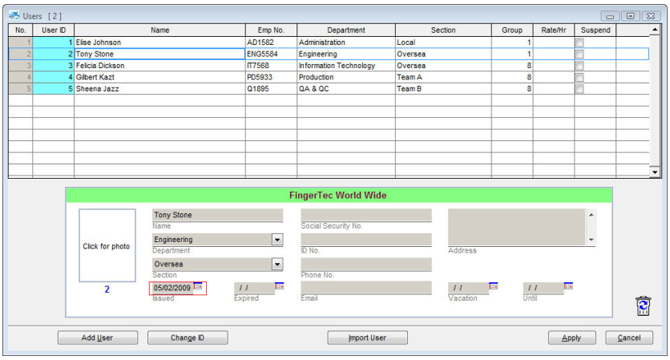
| When you deleted the user ID, the records in the attendance sheet will be deleted. The raw data of the user ID will still remain in the terminal data audit list. | ||||
| Solution: | ||||
| To view the deleted user ID records in the attendance sheet, add the deleted user ID in the Users, change the issued date and assign the deleted user ID group. After that, generate the attendance sheet. | ||||
|
||||
| Solution: | ||||
| Please configure the time for the rest day because without it, the transaction will not appear in the attendance sheet. For example: - OT: 07:00 and Done: 23:00. So if the user comes during this range on the rest day, it will appear in the attendance sheet and automatically counts as overtime. | ||||
|
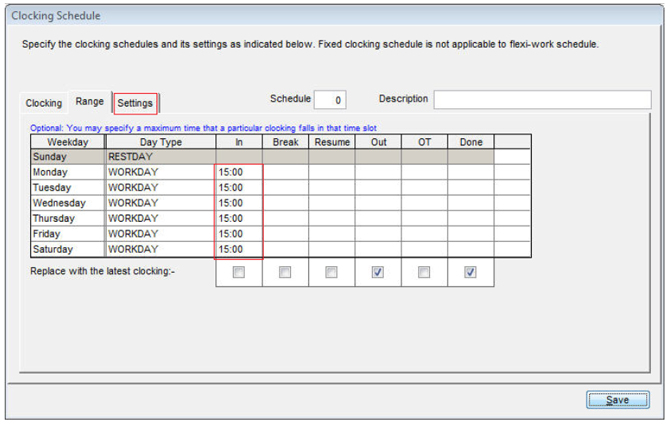
||||
| Please generate after making the changes. Based on the above setting, after the generating process, all transactions before 15:01 will appear in the IN column. | ||||
|
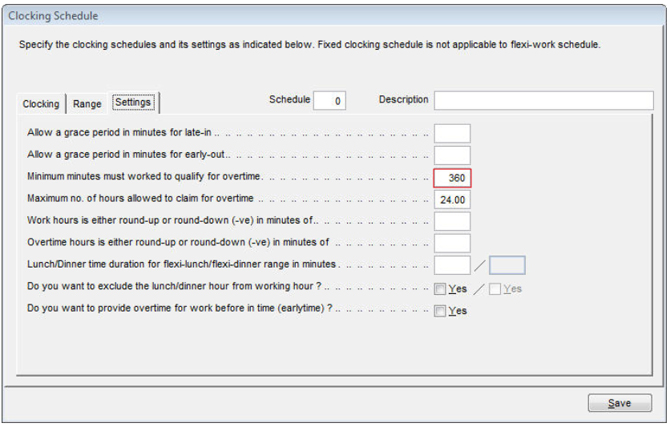
||||
Based on the above configuration, the “minimum minutes must worked to qualify for overtime” was 360 minutes or 6 hours. The user works for overtime 3 hours, so the system will not showing the overtime because the overtime did not exceed 6 hours. If you want the overtime to appear in the attendance sheet, please change the “minimum minutes must worked to qualify for overtime” setting e.g. 60 minutes or delete it. Then generate at the attendance sheet. After the generating process, the overtime will appear in the attendance sheet. |